How to A/B Testing Shopify Pricing (Tutorial)
Ever wonder if you could squeeze more profit out of your Shopify store just by tweaking your prices? Well, you're in luck. I'm about to show you how to run price tests on Shopify that'll make your wallet smile.
Look, I get it. Messing with your prices feels risky. What if you scare off customers? What if you leave money on the table? That's why we're not going in blind. We're going to use the power of A/B testing to find that pricing sweet spot.
By the end of this guide, you'll know exactly how to set up and run price tests on your Shopify store. No guesswork, just cold, hard data to back up your pricing decisions. Ready to boost your bottom line? Let's dive in.
Why Bother with Split Testing for Pricing?
Before we get into the nitty-gritty, let's talk about why price testing is worth your time:
- Maximize Profit: Find the optimal price point that balances sales volume and profit margins.
- Understand Your Customers: Discover how price-sensitive your audience really is.
- Stay Competitive: Keep your pricing strategy sharp in a constantly changing market.
- Boost Conversions: Sometimes, a small price tweak can lead to a big jump in sales.
Now that you're sold on the idea, let's get into the how-to.
Step 0: Install A/B Testing on your Shopify store
- Sign up for a Mida account if you haven't already: Free Account
- Install Mida.so pixel on your Shopify store by following this installation guide or watch the video below:
Step 1: Set Up Product Variants in Shopify
Once you have a Mida account, we need to create different price options for your product. Here's how:
- Log into your Shopify admin panel
- Navigate to the product you want to test
- Scroll down to the "Variants" section
- Click "Add option" and create a custom option called "Price"
- Add your price variations (e.g., Variation A, Variation B)
- Set the prices for each variation

For example, if you're selling a t-shirt currently priced at $25, you might create:
- Variation A: $25 (original price)
- Variation B: $29.99 (test price)
Pro Tip: Don't go crazy with too many variations. Start with just one alternative price to keep things simple.
Step 2: Set Up Your A/B Test
Now that we have our price variations, it's time to set up the actual test. We'll be using Mida.so for this, as it's a user-friendly and powerful A/B testing platform that works seamlessly with Shopify.
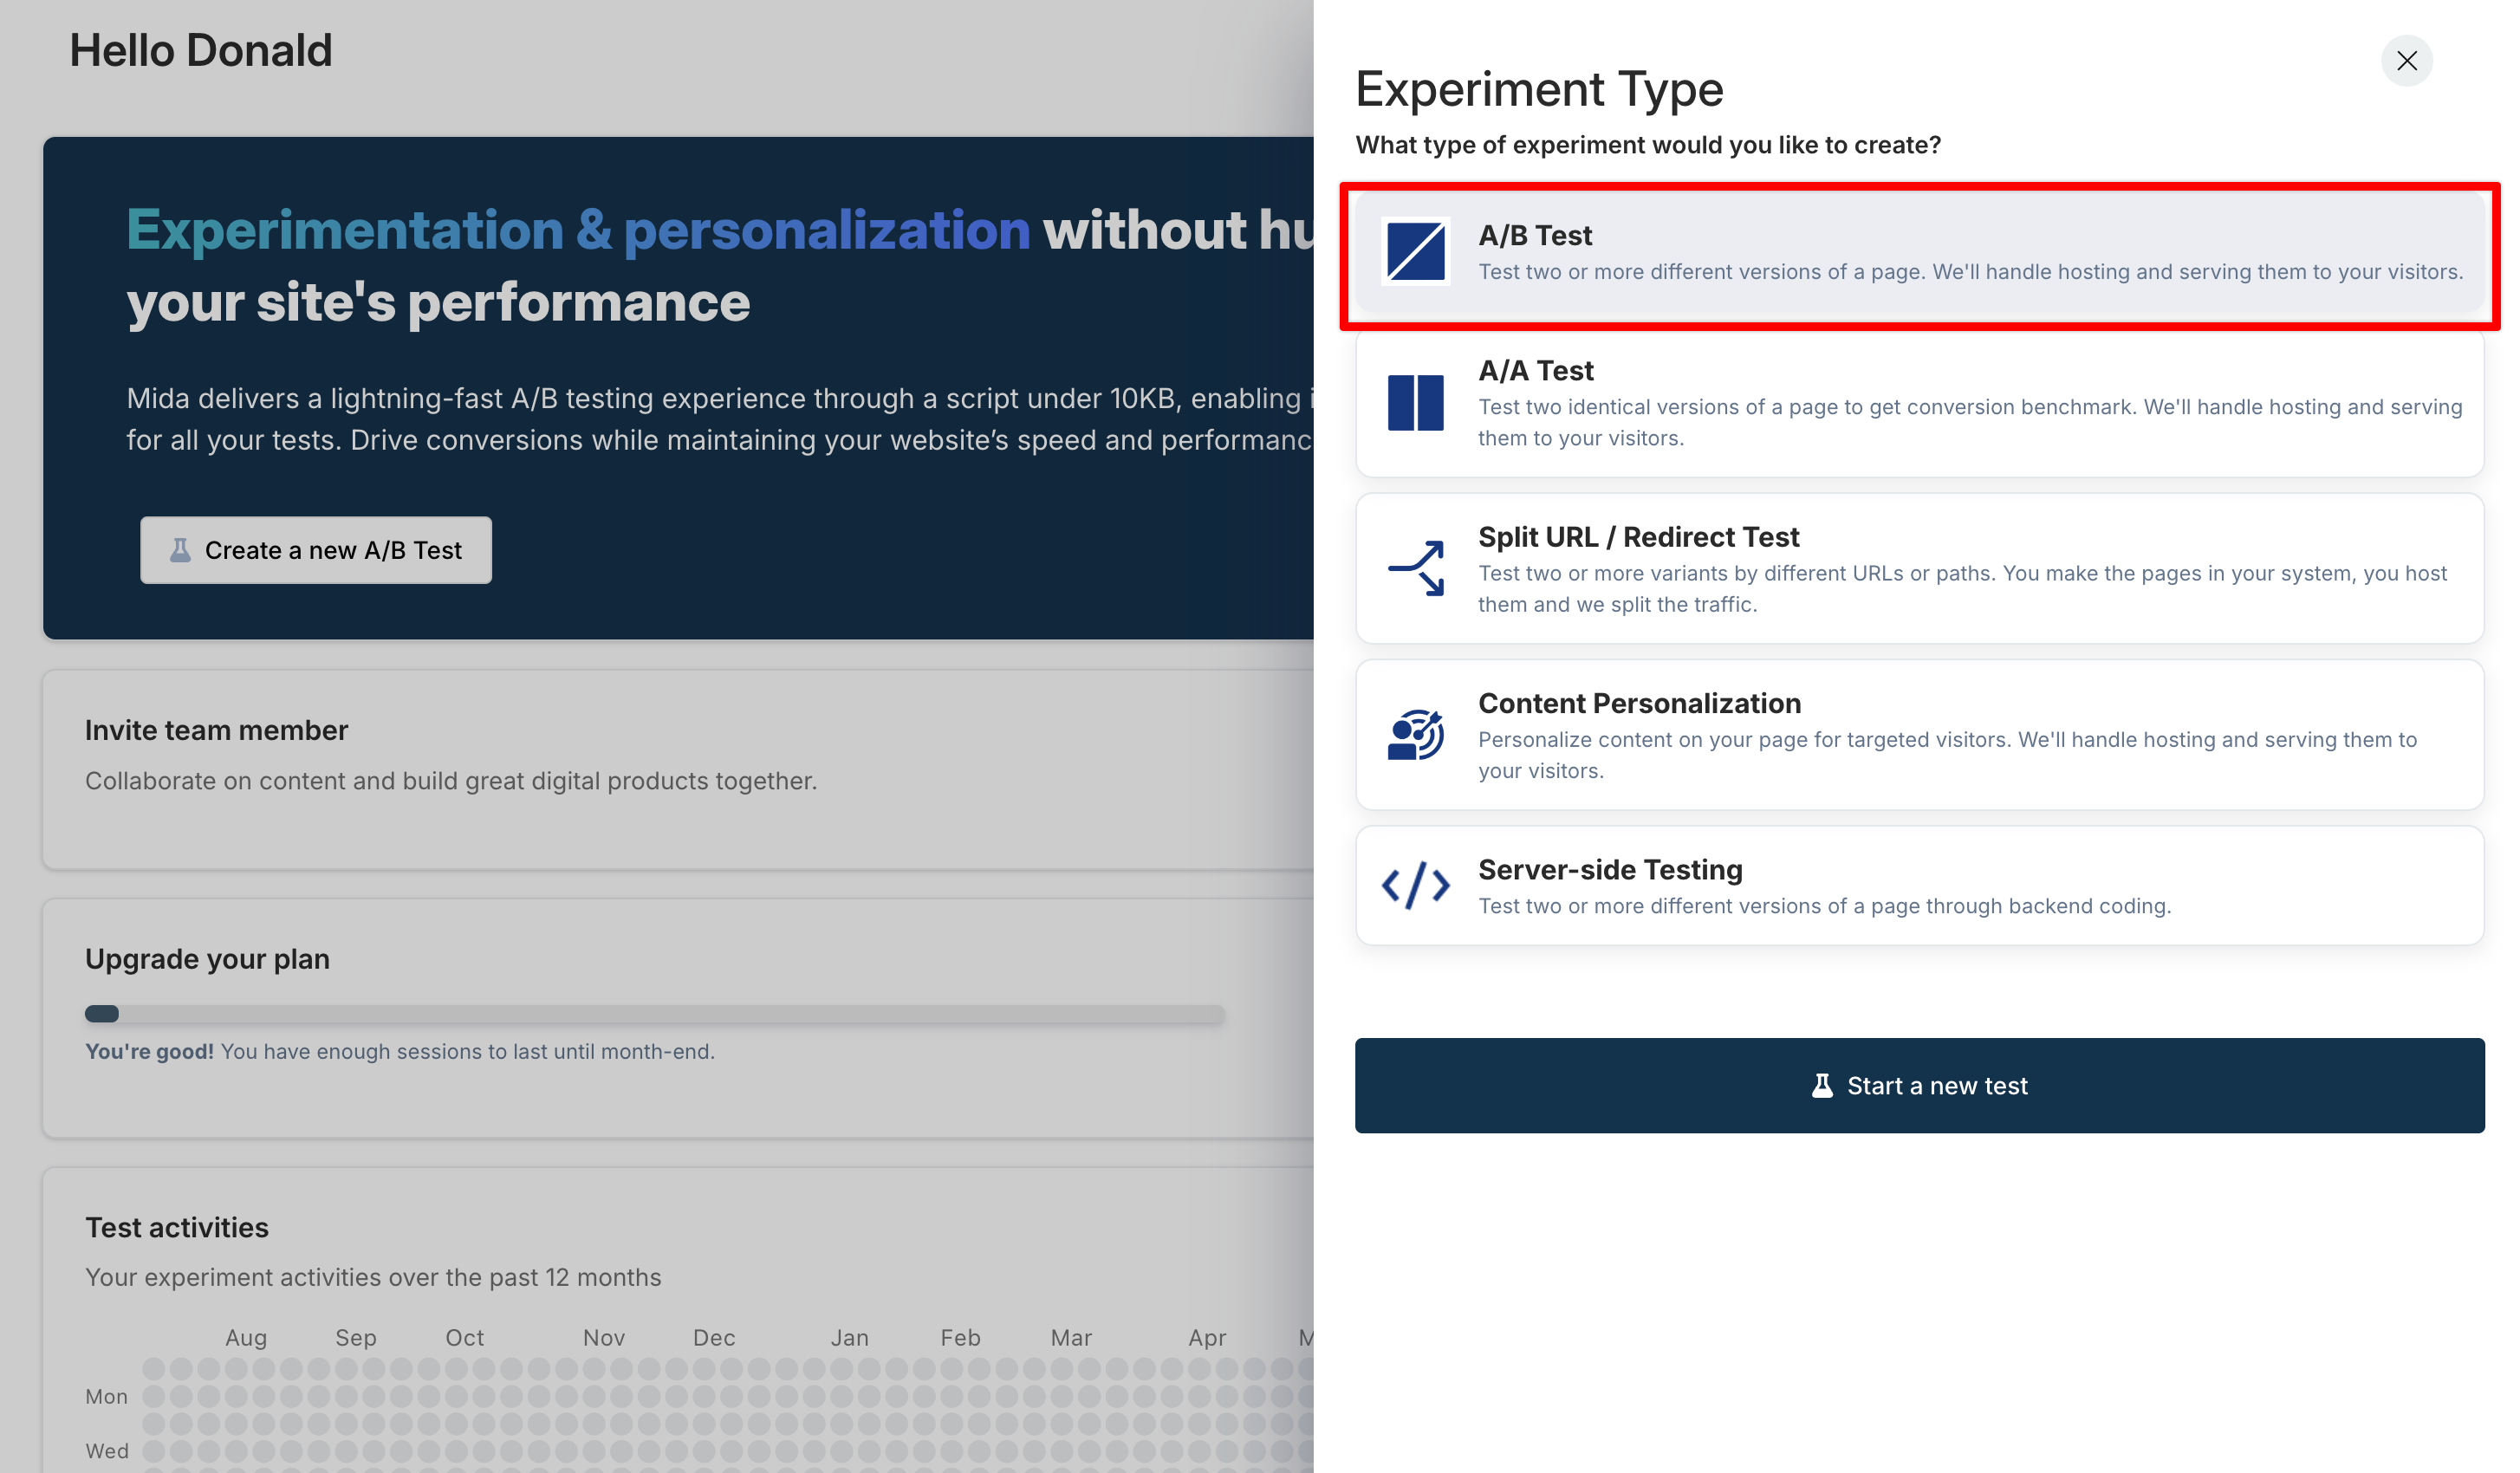
- In your Mida dashboard, click "Start a new test"
- Enter the URL of the product page you're testing
- Set up your variants:
- Control: Original price
- Variant 1: Test price

Step 3: Implement the Test Code
Here's where the magic happens. We need to add some code to make sure the right price shows up for each visitor.
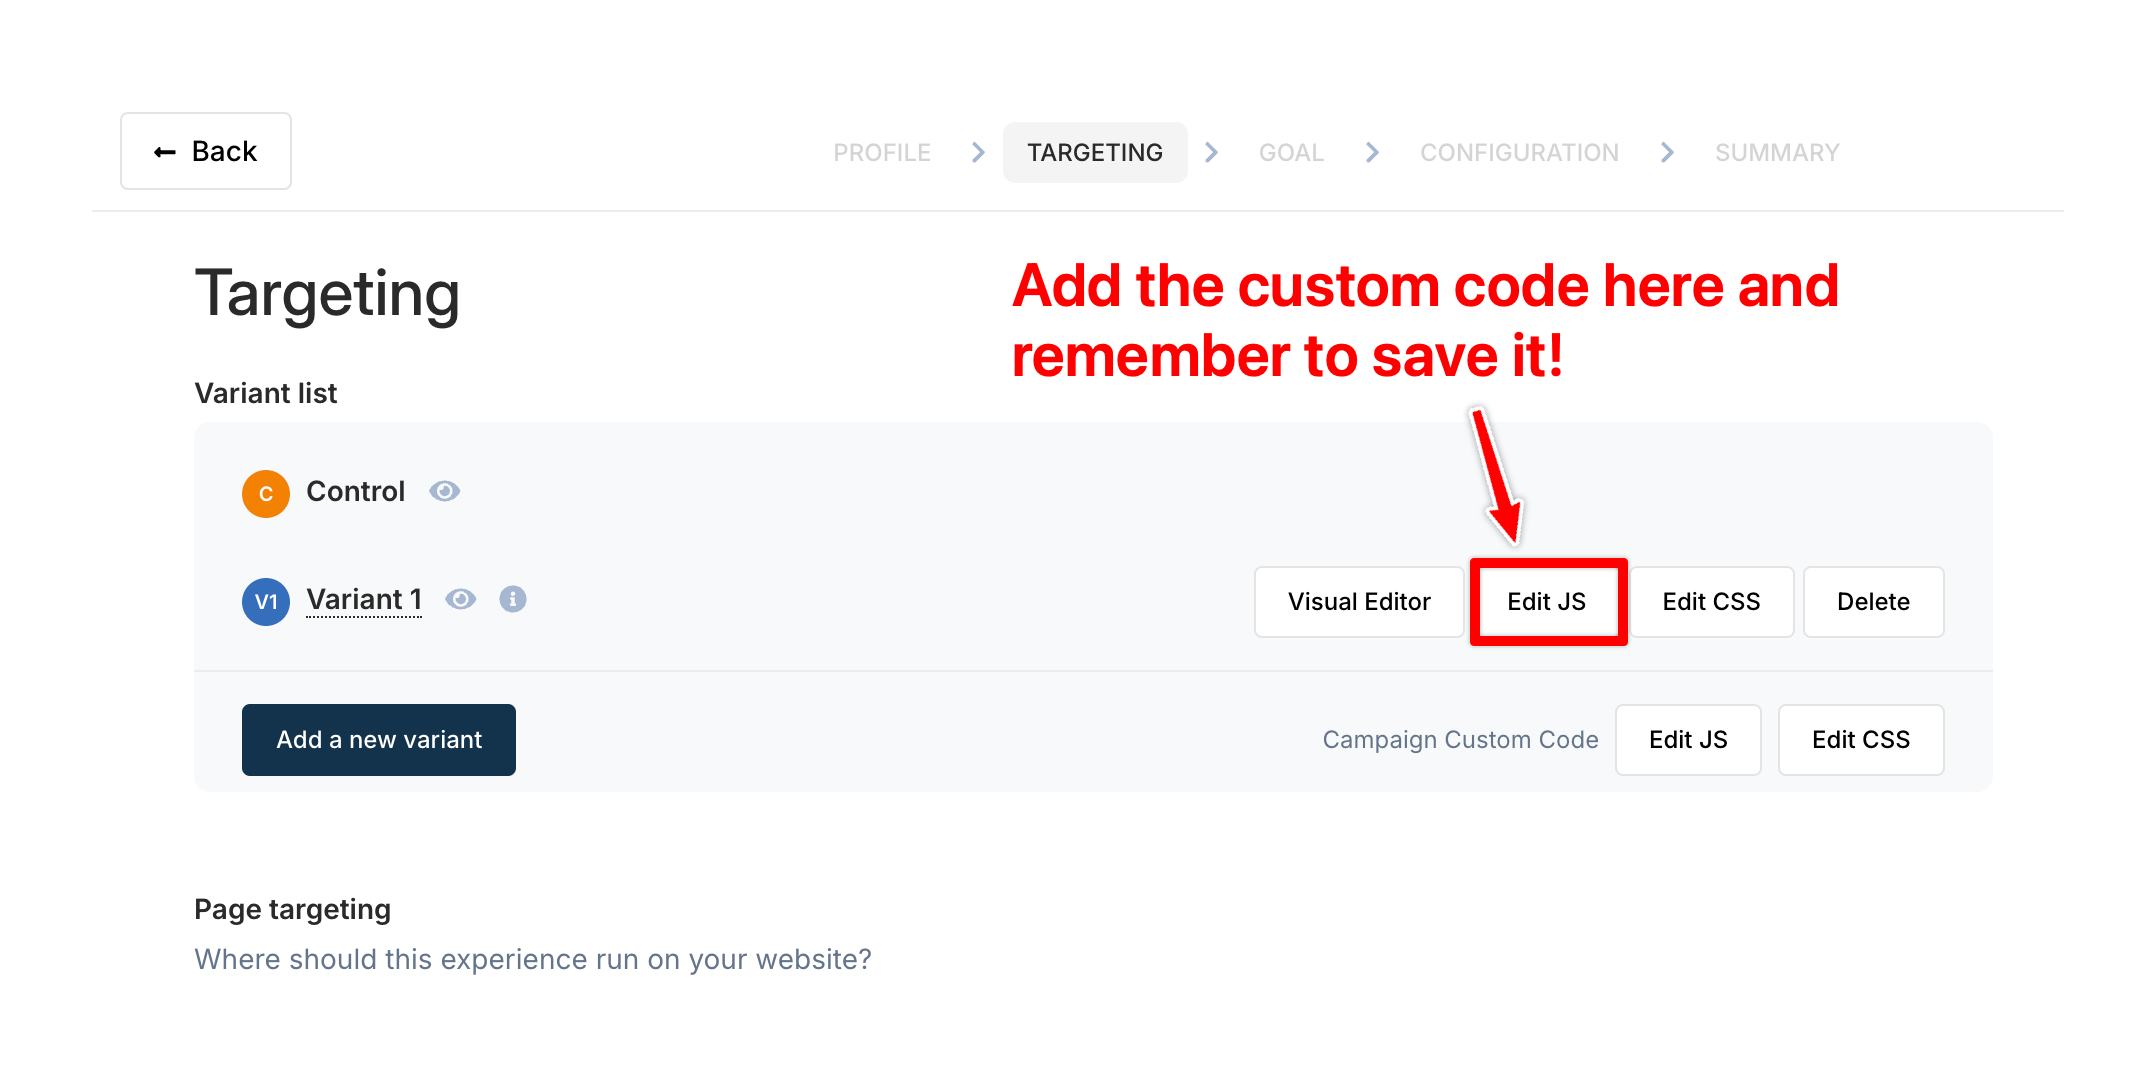
- In your Mida test setup, click "Edit" next to your variant
- Paste in this JavaScript code (adjust as needed for your specific setup):
This code automatically selects the test price variant when a visitor lands on the page.

Step 4: Hide the Price Selection from Visitors
We don't want customers to see the price options, so let's hide them:
- Go to your Shopify admin
- Navigate to Online Store > Themes
- Click "Actions" > "Edit code" on your current theme
- Find your theme.liquid file
- Add this CSS code just before the closing tag:
This will hide the price selection dropdown from your visitors.
Step 5: Launch Your Test
With everything set up, it's time to let it rip:
- Double-check all your settings in Mida
- Click "Publish Test"
- Monitor your results over the next few weeks
Important: Let your test run for at least 2-4 weeks to gather enough data. Don't jump to conclusions too quickly!
Analyzing Your Results
After your test has run its course, it's time to dig into the data. Here's what to look for:
- Conversion Rate: Did one price lead to more sales?
- Average Order Value: Did the higher price increase overall revenue?
- Statistical Significance: Make sure your results are statistically valid before making decisions.
Remember, it's not always about the highest conversion rate. Sometimes, a slightly lower conversion rate at a higher price can lead to more overall profit.
Learn how to analyze the A/B test report:
Common Pitfalls to Avoid
- Testing Too Many Variations: Stick to one alternative price at first.
- Ending the Test Too Soon: Give it time to gather meaningful data.
- Ignoring Seasonality: Be aware of how seasonal trends might affect your results.
- Forgetting About Perceived Value: Sometimes, a higher price can actually increase perceived value and boost sales.
Wrapping Up
There you have it – a step-by-step guide to A/B testing your Shopify prices. It might seem like a lot at first, but trust me, once you get the hang of it, you'll be running price tests like a pro.
Remember, pricing isn't just about numbers. It's about understanding your customers and finding that sweet spot where they feel they're getting great value, and you're maximizing your profit.
So go ahead, set up that first test. Your bottom line will thank you.
FAQs
Q: How often should I run price tests?
A: It depends on your market and product, but generally, every 3-6 months is a good rule of thumb.
Q: Can I test more than just price?
A: Absolutely! You can test things like product descriptions, images, or even bundle offers.
Q: What if my test shows no significant difference?
A: That's valuable information too! It might mean your current price is already optimal, or you might need to test a wider price range.
Q: Is it legal to show different prices to different customers?
A: Yes, as long as you're not discriminating based on protected characteristics. A/B testing is a common and accepted practice in e-commerce.
Q: How do I know if my results are statistically significant?
A: Mida.so provides built-in statistical analysis tools to help you interpret your results with confidence.
Ready to start optimizing your Shopify pricing? Head over to Mida.so and start your first A/B test today. Your profit margins will thank you!


.svg)
